

Level 90, ilvl 560
0
Thavnair (X:16.0, Y:33.6)
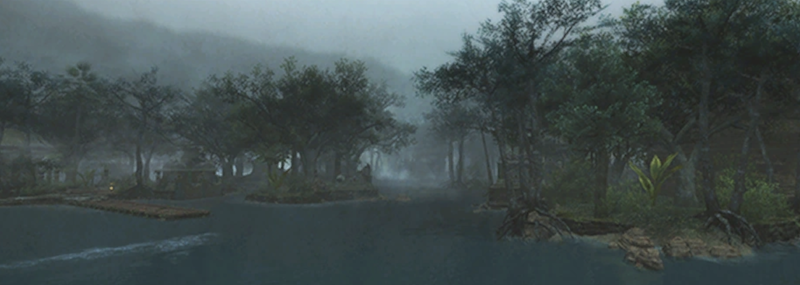
 Alzadaal's Legacy
Since the days of old, the imagination of the Thavnairian people has been captured by a persistent legend─the promise that somewhere, beneath the shimmering expanse of the Bounty, lies hidden the treasure vault of Alzadaal III. Yet how might one claim the fabled satrap's hoard where so many other reckless souls have tried and fallen? Will Estinien's dubious map lead you true to the rumored isle and its moldering ruins? Whatever peril waits ahead, it is certain to be an adventure!
In the battle against Ambujam, there are three different attacks to watch out for. The first is called Big Wave, which deals moderate damage to the entire party and inflicts a weak Bleed damage over time effect. The second attack is Tentacle Dig, where Ambujam submerges one or both of its larger tentacles and moves them around. This is indicated by ripples in the water. After a few seconds, the tentacles will stop moving and erupt into large circle AoEs that deal high damage and inflict a strong Toxicosis damage over time debuff. The third attack is Toxic Fountain, which involves three sets of circle AoEs appearing and bursting with high damage and knockback in the order they appeared. To determine the safe spots during Tentacle Dig, pay attention to the patterns in the water. The tentacles can start at either the boss's left or right flank-midpoint. From there, they will move towards the opposite flank-midpoint along one of two possible paths. If the waves in the water proceed along the outside of the boss's hitbox, the safe spot will be on the side opposite where the tentacle started. On the other hand, if the waves in the water go into the boss's hitbox to reach the opposite flank-midpoint, the safe spot will be on the same side as where the tentacles started. By identifying these patterns, you can quickly determine the safe spots. In the case of two tentacles, one side of the arena will be safe from both AoEs, and this safe side will be opposite to where the tentacle that moves along the outside of the boss's hitbox started. So, to summarize, the far opposite side of the arena will always be the safe spot based on the originating side of the tentacle.
During the "Articulated Bits" phase, the Armored Chariot will move to the center of the arena and create an electricity puddle that inflicts a damage over time debuff called "Electrocution". Clockwork Death Claws will appear in the corners, marked with either 1 or 2 pips, and face the boss. The Chariot will create violet shields and position them to face the Death Claws. The Death Claws will then fire a large laser that reflects off the shield, creating a cone AoE in that area of the arena. Standing in the lasers will cause damage over time and a strong debuff called "Sustained Damage". After the first set of Death Claws fire, the Chariot will rotate its shields to the second set and repeat the process. The second cast of this ability will summon two Death Claws in opposing corners, along with additional Death Claws that aim across the arena and not at the Chariot. All of the Death Claws will fire at the same time, creating narrow safe spots next to the Death Claws not firing directly at the boss. Subsequent casts will alternate between the first and second versions. The boss also has other abilities, including "Diffusion Ray" which deals moderate damage to the entire party, "Graviton Cannon" which targets circle AoEs on each player and is used alongside every other "Articulated Bits" cast from the third onward, and "Rail Cannon" which is a tankbuster.
The boss's arena is filled with spike traps that cause a bleeding damage over time debuff when stepped on. The traps along the edges of the arena are always active, while the ones in the center extend and retract depending on the boss's abilities. One ability called "Spin Out" involves the boss moving to the northern edge of the arena, pulling all players towards him, and wrapping them in ribbons while inflicting fetters. During this attack, several spike traps in the arena extend spikes. The boss then unravels the ribbons, causing all players to spin uncontrollably for 10 seconds. While spinning, players slowly move in the direction indicated by a hand above their heads. Trying to turn only results in loose turns. When the spinning ends, players become dizzy for 2 seconds, preventing movement and skill use. The boss then returns to the center of the arena and the spikes retract. Another ability, "Basting Blade," is used in the second cast of Spin Out. It involves the boss leaping to the opposite edge of the arena and releasing a wide line attack. This attack is repeated twice before the spinning and dizzy debuffs wear off. Other abilities include "Crewel Slice," a tankbuster attack, "Wild Weave," where ropes descend from the ceiling and cause explosive AoEs, "Magnitude Opus," which places a stack marker on a random player, and "Rotary Gale," which targets players with circle AoEs. It is important to note that the boss's line AoEs in the second spinning attack are not random. The boss always hits the middle of the arena and a small portion of the sides first, then either side as the second attack. Therefore, the recommended path when spinning is to go all the way to the back of the arena along the far left or far right sides during the first line AoE. Then, as the boss finishes the first attack and prepares for the second, make a U-turn to spin back to the front along the middle column of the arena.